
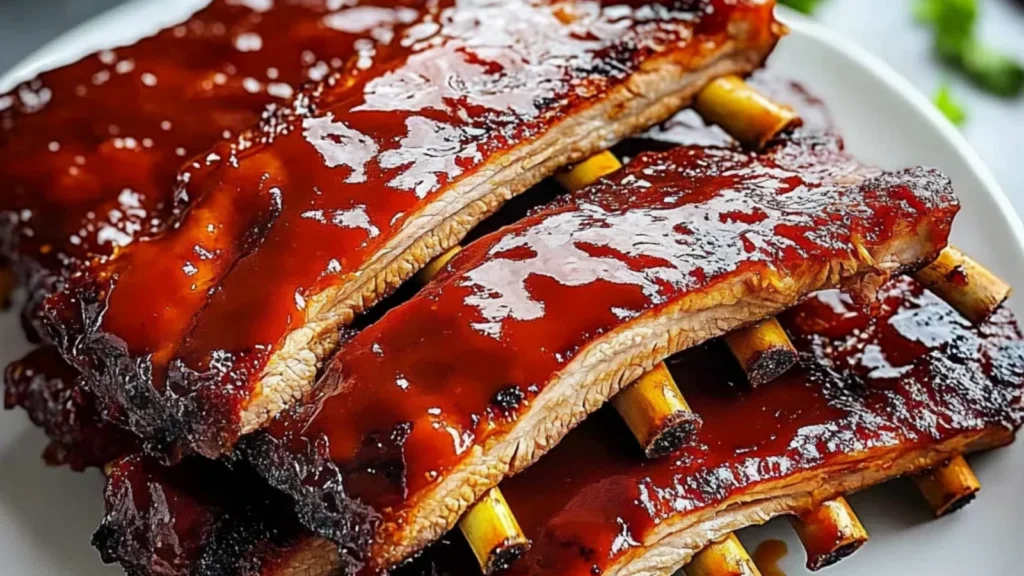
Imagine sinking your teeth into a rack of ribs in oven, where tender, juicy meat falls off the bone, enveloped in a smoky glaze that dances with sweet and spicy notes. The aroma wafts through your kitchen, teasing your senses and making your mouth water with anticipation for that first delicious bite.
As you gather around the table with family or friends, laughter fills the air, and memories are made over this mouthwatering dish that transforms any ordinary evening into a celebration. These ribs aren’t just food; they’re an experience—perfect for game nights, backyard barbecues, or cozy family dinners when you want to impress without breaking a sweat!
Succulent and tender, these oven-baked ribs are a guaranteed crowd-pleaser! Easy to prepare, with just 15 minutes of hands-on time, they fit perfectly into any busy schedule. Flavor-packed with a homemade dry rub, each bite bursts with sweet and savory goodness. Versatile enough for weeknight dinners or special gatherings, these ribs can be paired with your favorite sides. Time-saving slow cooking ensures they’ll be fall-off-the-bone delicious, making them a favorite for all BBQ enthusiasts!
For the Ribs
For the Dry Rub
For the Barbecue Sauce

1. Preheat the oven to 300°F (150°C). This steady temperature will help your 2 pounds of pork ribs become incredibly tender and flavorful during the long cooking process.
2. Remove the membrane from the back of the ribs for better flavor and tenderness. This step is crucial, as it allows the dry rub to penetrate deeply into the meat.
3. Mix together the ingredients for the dry rub in a small bowl: 2 tablespoons brown sugar, 1 tablespoon paprika, 1 tablespoon garlic powder, 1 tablespoon onion powder, 1 teaspoon black pepper, 1 teaspoon salt, and optionally, 1 teaspoon cayenne pepper for some heat.
4. Rub the dry mixture all over both sides of your pork ribs. Make sure every inch is covered; this will create a beautiful crust when cooked!
5. Wrap the ribs tightly in aluminum foil and place them on a baking sheet. The foil will trap moisture, making your ribs juicy as they bake.
6. Bake in the preheated oven for 2.5 to 3 hours until tender. You’ll know they’re done when they start pulling away from the bone and are fork-tender.
7. Remove the ribs from the oven and increase the temperature to 400°F (200°C). This will prepare your oven for that perfect finishing glaze!
8. Unwrap the ribs and brush them generously with your favorite barbecue sauce (about 1 cup). This layer of sauce will add incredible flavor and stickiness that everyone loves.
9. Return the ribs to the oven uncovered for an additional 30 minutes, basting with more sauce halfway through. This step creates that irresistible caramelized exterior!
10. Check for doneness using a meat thermometer; ensure that the internal temperature reaches at least 145°F (63°C) for perfectly cooked ribs.
11. Remove from the oven, let rest for a few minutes, then slice and serve! The anticipation will be worth it as you enjoy these tender delights with family and friends.
Optional: Serve with extra barbecue sauce on the side for dipping!
Exact quantities are listed in the recipe card below.
Feel free to get creative and customize these succulent ribs to suit your taste preferences!

Preparing ribs in the oven is a fantastic choice for meal prep, allowing you to plan ahead and enjoy tender, flavorful ribs when the time is right. You can prepare the dry rub—mixing 2 tablespoons of brown sugar, 1 tablespoon each of paprika, garlic powder, and onion powder, along with 1 teaspoon each of black pepper, salt, and cayenne pepper—up to 3 days in advance. Simply store it in an airtight container. When you’re ready to cook, follow the steps: Preheat your oven to 300°F (150°C), remove the membrane from the back of the 2 pounds of pork ribs, and generously rub the spice mixture over both sides. Wrap the ribs tightly in aluminum foil and bake them for 2.5 to 3 hours until tender. After cooking, you can brush on your favorite barbecue sauce and increase the oven temperature to 400°F (200°C) for a final glaze. These steps can be done up to 24 hours before serving; simply let them cool in the fridge after baking and reheat them with the sauce when you’re ready for a delicious meal that saves you time without sacrificing flavor!
What type of pork ribs should I use for this recipe?
You can use either baby back ribs or spare ribs, depending on your preference. Baby back ribs are leaner and more tender, while spare ribs have more meat and a richer flavor. Both will turn out delicious when slow-cooked in the oven!
How do I know if my ribs are cooked properly?
To ensure your ribs are perfectly cooked, check for doneness with a meat thermometer. The internal temperature should reach at least 145°F (63°C). Additionally, the meat should be tender and easily pull away from the bone when you try to slice it.
Can I store leftover ribs, and how long do they last?
Absolutely! You can store leftover ribs in an airtight container in the refrigerator for up to 3-4 days. Just make sure they cool down to room temperature before sealing them up. For longer storage, consider freezing them; they’ll keep well for about 3 months.
What can I substitute for cayenne pepper if I want a milder flavor?
If you’re looking to avoid heat altogether, simply omit the cayenne pepper from the dry rub mix. Alternatively, you could replace it with a pinch of smoked paprika for a subtle smoky flavor without any spice.
How should I serve these ribs?
These tender, flavorful ribs are perfect as a main dish! Serve them with classic sides like coleslaw, cornbread, or baked beans for a complete meal. You can also add extra barbecue sauce on the side for dipping—always a crowd-pleaser!
What’s the best way to reheat leftover ribs?
To reheat your leftover ribs while keeping them juicy and flavorful, wrap them in aluminum foil and place them in a preheated oven at 250°F (120°C) for about 20-30 minutes. This gentle heat will help retain moisture and prevent drying out!