
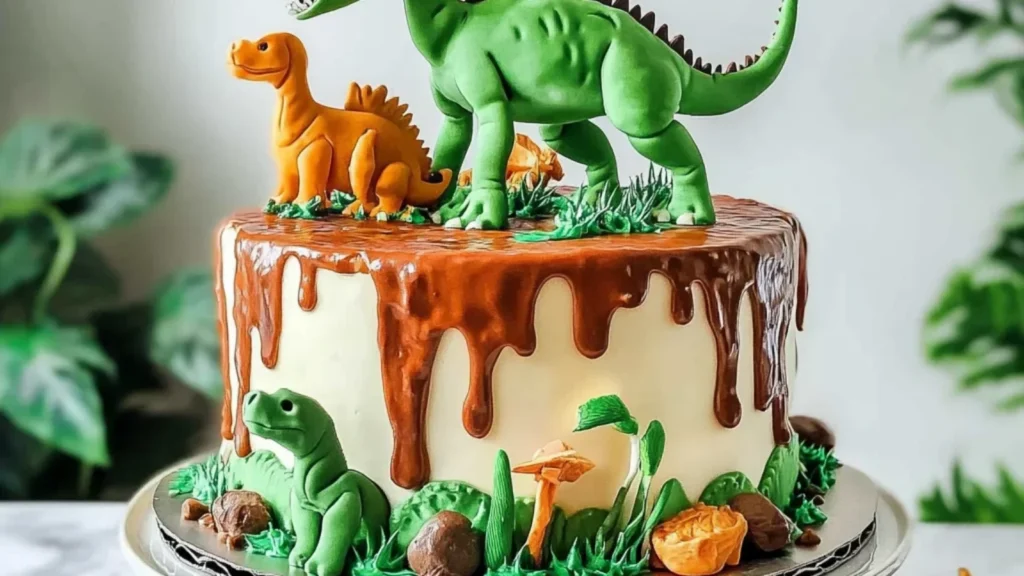
Imagine a cake that roars with flavor and brings a prehistoric party to life! This dinosaur cake is a delightful concoction of fluffy layers, vibrant colors, and an explosion of sweet aromas that could make even the grumpiest of adults break into a smile. Perfectly suited for birthdays or any adventurous gathering, this whimsical treat will not only satisfy the sweet tooth but also spark joy in children and adults alike.
Growing up, I remember the thrill of blowing out candles atop a cake decorated with all my favorite things—dinosaurs included! The excitement in the room as we unveiled the cake felt magical, and every bite was met with laughter and delight. With this dinosaur cake, you can recreate those cherished moments while adding your unique twist to each slice. Prepare for a nostalgic journey filled with fun flavors and unforgettable memories that will make your occasion truly special!
Delightful and Fun – This whimsical dinosaur cake is sure to bring joy to any children’s party, making it a memorable centerpiece that sparks imagination.
Easy to Bake – With just 30 minutes of prep and cooking time, this recipe allows for a stress-free baking experience that even novice bakers can master.
Rich Flavor – The combination of cocoa powder and vanilla creates a moist and deliciously chocolatey cake that kids (and adults!) will devour.
Versatile Decor – Use your creativity with colorful dinosaur figurines and green sprinkles to customize the cake for any party theme, ensuring every celebration feels unique.
Crowd-Pleasing Appeal – Perfect for birthdays or playdates, this cake is guaranteed to impress both kids and parents alike, making it a hit at any gathering!
For the Batter
For the Frosting
For Decorations

1. Preheat the oven to 350°F (175°C). Grease and flour two 9-inch round cake pans to ensure your cake layers slide out easily once baked.
2. Combine the dry ingredients in a mixing bowl: 2 cups all-purpose flour, 1.5 cups granulated sugar, 0.5 cups unsweetened cocoa powder, 1 tablespoon baking powder, 1 teaspoon baking soda, and 1 teaspoon salt. Mixing these well will give your cake a lovely texture.
3. Add the wet ingredients: pour in 1 cup milk (or any non-dairy milk), 0.5 cups vegetable oil, 2 large eggs, and 2 teaspoons vanilla extract. Mix until smooth for a luscious batter that smells heavenly!
4. Divide the batter evenly between the prepared pans and bake for 30 minutes, or until a toothpick inserted comes out clean. Your kitchen will be filled with a delightful aroma as it bakes!
5. Cool the cakes in the pans for 10 minutes before transferring them to a wire rack to cool completely. This step is crucial for avoiding soggy bottoms!
Prepare the Frosting:
6. Beat the softened butter in a mixing bowl until creamy and light-colored—this should take about 2-3 minutes—creating a fluffy base for your frosting.
7. Gradually add in 4 cups powdered sugar and 0.5 cups cocoa powder while mixing until well combined. This will create a rich chocolate flavor that’s simply irresistible.
8. Mix in the vanilla extract and 2 tablespoons of milk, continuing until the frosting is smooth and spreadable. Adjust with more milk if needed for the perfect consistency.
Assemble the Cake:
9. Place one cooled cake layer on a serving plate and spread a generous layer of frosting on top to create a delicious surprise beneath your dinosaur decorations.
10. Top with the second cake layer and frost both the top and sides of the cake with remaining frosting for an eye-catching finish that’s sure to impress!
11. Decorate with dinosaur figurines atop your whimsical creation, then sprinkle green sprinkles around the base to evoke grass for your dino friends to frolic on.
Optional: Add edible glitter for an extra magical touch!
Exact quantities are listed in the recipe card below.
Get creative and make this delightful treat uniquely yours with these fun and flavorful twists!

If you’re planning a dino-mite birthday bash, this dinosaur cake is ideal for meal prep! You can prep the cake layers and frosting up to 24 hours in advance. Start by baking the cake: after letting it cool completely, wrap each layer tightly in plastic wrap and store them in the fridge. The frosting can also be made ahead—just keep it in an airtight container at room temperature. When you’re ready to assemble your whimsical creation, simply frost the layers and decorate with your delightful dinosaur figurines and vibrant green sprinkles around the base to mimic grass. This approach not only saves you time on the big day but ensures that your dino-themed masterpiece is fresh and fabulous!
Can I use whole wheat flour instead of all-purpose flour?
Absolutely! You can substitute half of the all-purpose flour with whole wheat flour for a nuttier flavor and added nutrition. Just keep in mind that the cake may be denser, so you might want to add an extra tablespoon of baking powder to help it rise.
How should I store leftover dinosaur cake?
To keep your dinosaur cake fresh, store it in an airtight container at room temperature for up to 3 days. If you need to keep it longer, place it in the refrigerator where it can last for about a week. Just remember to let it come to room temperature before serving for the best flavor and texture!
Can I freeze the dinosaur cake?
Yes, you can freeze this delightful cake! Wrap the cooled layers tightly in plastic wrap and then in aluminum foil. They’ll stay fresh for up to 3 months in the freezer. When you’re ready to enjoy, simply thaw them overnight in the refrigerator and frost as desired.
What if my frosting is too thick?
If your frosting turns out too thick, don’t worry! Simply add a little more milk—one tablespoon at a time—until you achieve that smooth, spreadable consistency. It’s always better to start with less liquid and gradually add more, so your frosting doesn’t become too runny.
How many servings does this dinosaur cake yield?
This whimsical dinosaur cake serves about 8 people, making it perfect for a small gathering or children’s party. If you’re expecting more guests or just want leftovers (who wouldn’t?), consider doubling the recipe and using larger pans for a towering treat!
Is there a dairy-free option for this recipe?
Yes, indeed! You can easily make this dinosaur cake dairy-free by substituting cow’s milk with any non-dairy milk such as almond milk or oat milk. Additionally, ensure your butter is replaced with a dairy-free alternative like vegan butter for the frosting. Enjoy crafting this fun cake without any dairy worries!