Delicious Grinch Cookies Recipe for a Festive Holiday Treat
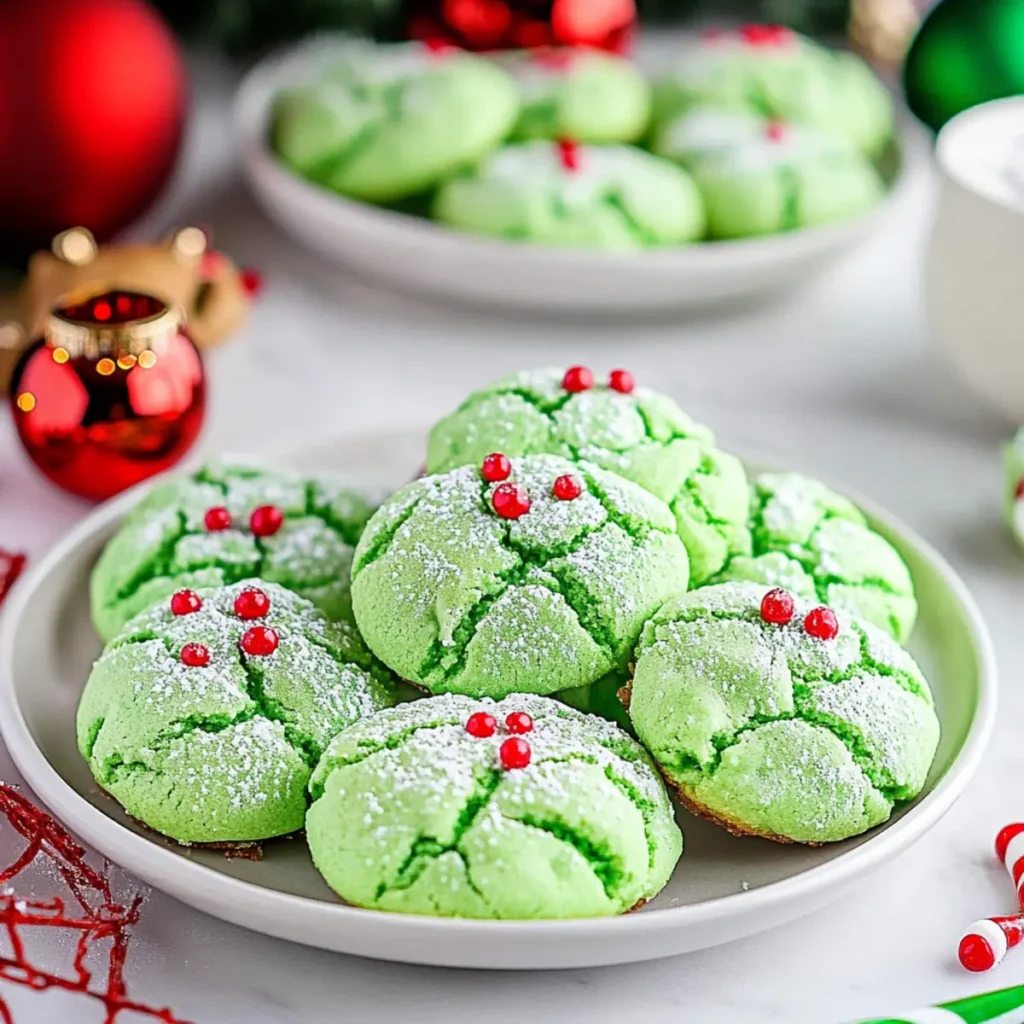
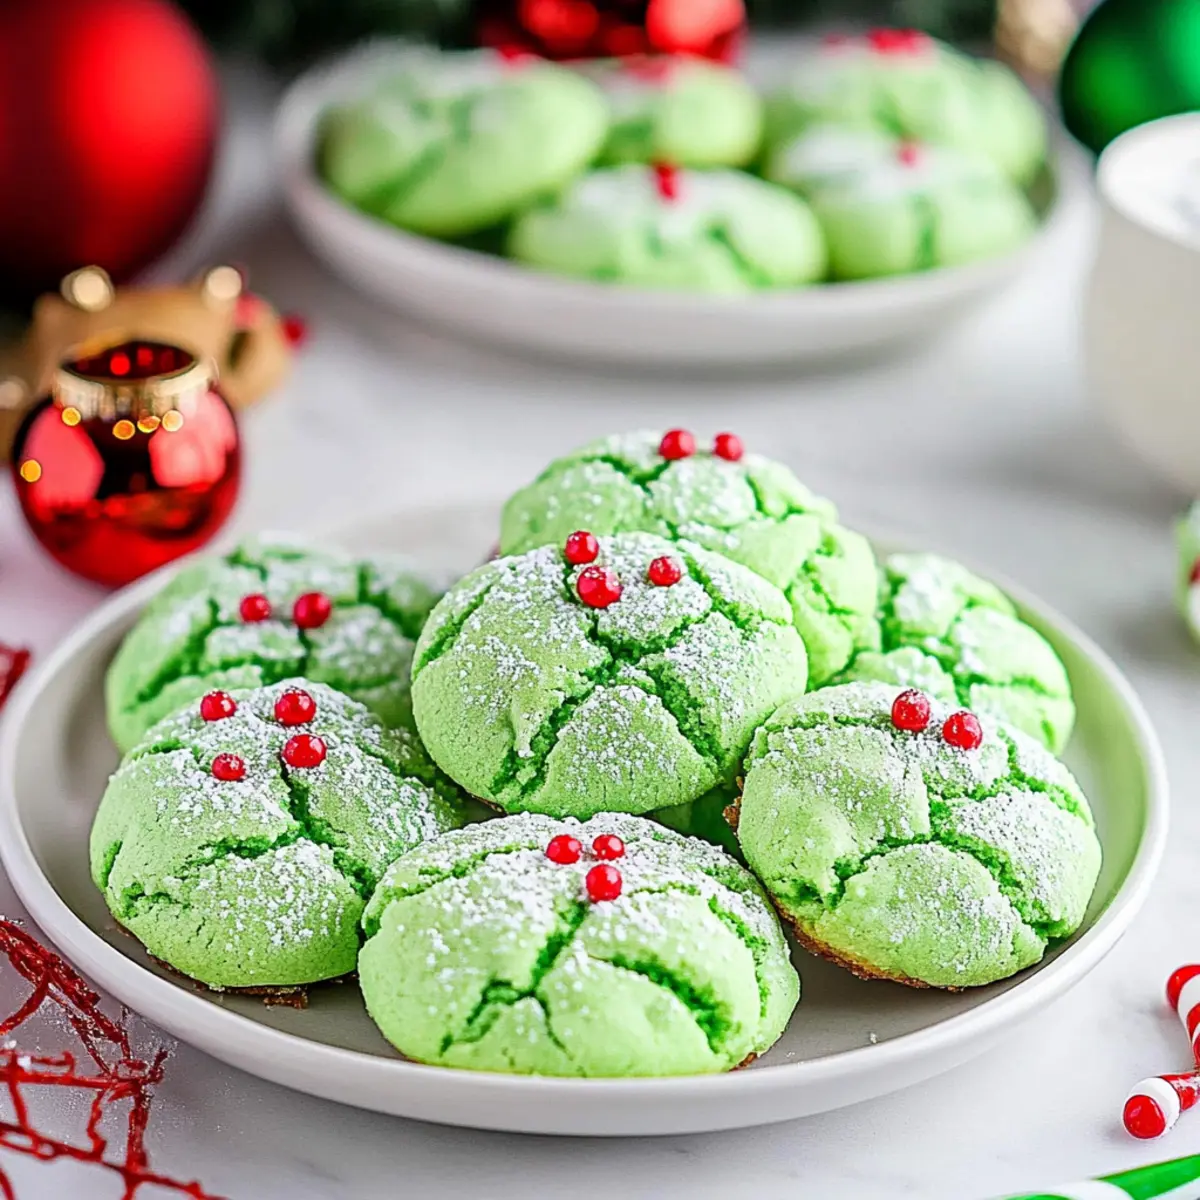
The holidays are all about joy, warmth, and, of course, delicious treats that make your taste buds dance! Imagine pulling a tray of vibrant green Grinch Cookies from the oven, their minty aroma filling your kitchen like a festive hug. These cookies are not just eye-catching; they’re a delightful blend of gooey, chewy goodness with a touch of holiday spirit. With their bright color and bursting flavor, they’re bound to become a cherished treat in your holiday repertoire.
The story of these Grinch Cookies goes beyond taste; it’s about creating moments. I recall one chilly December evening when I baked a batch to share with friends at our annual cookie swap. The laughter and cheer that filled my home as those cookies disappeared in record time are memories I cherish. Whether you’re making them for family gatherings, holiday parties, or simply to indulge your own sweet tooth, these cookies promise to bring smiles all around—trust me!
Why You'll Love This Grinch Cookies
This incredible Grinch Cookies transforms simple everyday ingredients into restaurant-quality flavors that will blow your mind completely.
Foolproof recipe techniques guarantee perfect results every single time, making even novice cooks feel like professional chefs instantly.
Stunning visual appeal with gorgeous colors and mouthwatering aromas creates the ultimate Instagram-worthy dish for any special occasion.
Endlessly adaptable for different dietary needs while working beautifully for meal prep, date nights, or entertaining large groups effortlessly.
Ingredients for Grinch Cookies
Here’s what you’ll need to make this delicious Grinch Cookies:
15.25 ounces white cake mix – The base of our cookies that provides a sweet and fluffy texture. Look for a quality brand for the best results.
8 tablespoons unsalted butter – This key ingredient adds richness and helps create a soft, chewy cookie. Make sure it’s softened to room temperature.
2 large eggs – They bind the ingredients and give the cookies structure. Fresh eggs will yield the best flavor and texture.
2 teaspoons peppermint extract – For that refreshing kick of mint that screams holiday spirit; use a good quality extract for enhanced flavor.
½ teaspoon vanilla extract – This adds a lovely depth of flavor, balancing the sweetness and mintiness perfectly.
green gel food coloring – To give the cookies their festive Grinch-like hue; gel food color works best for a vibrant look.
¼ cup powdered sugar – This creamy dusting adds sweetness and helps create the beautiful coating on each cookie.
3 tablespoons cornstarch – If you’re looking for that soft, melt-in-your-mouth texture, cornstarch is your golden ticket!
red heart-shaped sprinkles or cinnamon – For that festive finishing touch; choose whichever you prefer for added charm and sweetness.
How to Make Grinch Cookies
Follow these simple steps to prepare this delicious Grinch Cookies:
Step 1: Preheat the Oven
Begin by preheating your oven to 375°F (190°C). While it’s warming up, line a large baking sheet with parchment paper, ensuring those cookies won’t stick!
Step 2: Combine the Base
In a mixing bowl, grab your hand-held mixer or stand mixer and combine the white cake mix, softened unsalted butter, and eggs. Mix until they meld into a thick, sticky batter that’s an absolute dream to work with.
Step 3: Flavor It Up
Next, add in the peppermint extract, vanilla extract, and a few drops of green gel food coloring. Mix on low speed just until combined—don’t overdo it! The batter should remain thick and vibrant, reminiscent of a Grinch-themed winter wonderland.
Step 4: Prepare the Coating
In a small bowl, whisk together the powdered sugar and cornstarch. This mixture will lend your cookies a delightful sweetness and help them look enchanting!
Step 5: Form the Cookies
Take a cookie scoop (about 1 ½ tablespoons worth) and scoop the dough. Roll the cookie dough balls in your sugar-cornstarch mixture, coating them before placing them about one inch apart on the prepared baking sheet.
Step 6: Bake and Decorate
Slide the cookies into the oven and bake for 10 to 12 minutes, or until the edges are set, and the tops look dry. As soon as you take them out, place a heart-shaped sprinkle on each cookie, pressing gently so they stick.
Allow your cookies to cool on the baking sheet for 5 minutes before transferring them to a wire rack to cool completely. Then, they’re ready to spread cheer!
There you have it, your festive Grinch Cookies filled with love, laughter, and a burst of minty goodness. These vibrant treats are perfect for any holiday occasion and guarantee to elicit “oohs” and “aahs” wherever you serve them. Happy baking, and may your holidays be as cozy as a cup of cocoa!
You Must Know About Grinch Cookies
This showstopping Grinch Cookies delivers restaurant-quality results using simple ingredients you probably already have at home.
The perfect balance of textures and flavors creates an unforgettable dining experience that will have everyone asking for seconds.
Picture-perfect presentation with vibrant colors makes this dish absolutely Instagram-worthy and guaranteed to impress any dinner guest.
Incredibly versatile recipe that works beautifully for weeknight dinners, meal prep, special occasions, or even outdoor entertaining sessions.
Perfecting Grinch Cookies Cooking Process
Start your Grinch Cookies journey by preheating your oven, preparing your baking sheet, and gathering all your ingredients. Mix the wet ingredients first, ensuring everything is well-combined before gently incorporating the dry ingredients. This organized approach guarantees a smooth texture and vibrant color.
Add Your Touch to Grinch Cookies
Get creative with your Grinch Cookies! Consider swapping the peppermint extract for almond or vanilla for a different flavor profile. Add in chocolate chips, crushed candies canes, or even nuts for a delightful crunch. Let your imagination run wild!
Storing & Reheating Grinch Cookies
To keep your Grinch Cookies fresh, store them in an airtight container at room temperature for up to a week. If you’re freezing them, place the cookies in a freezer-safe bag and they’ll last for up to three months. Reheat briefly in the microwave for that fresh-baked taste.
Chef's Helpful Tips for Grinch Cookies
This professional-quality Grinch Cookies relies on precise timing and temperature control to achieve restaurant-standard results consistently.
Master the art of mise en place by prepping all ingredients beforehand, ensuring smooth execution and preventing any last-minute cooking disasters.
The secret lies in layering flavors throughout the cooking process rather than seasoning only at the end for maximum depth.
Pro tip: let the finished dish rest for optimal texture and flavor development before serving to hungry guests waiting eagerly.
My fondest memory of making Grinch Cookies was when my niece and I baked them together. The joy on her face when we pulled them from the oven, all green and adorned with heart sprinkles, was priceless.
FAQs About Grinch Cookies
What is Grinch Cookies?
Grinch Cookies are festive, vibrant treats that capture the holiday spirit with their bright green color and delightful flavors. Made using a simple white cake mix, these cookies are infused with peppermint extract, making them both fun and delicious. Topped with cute heart-shaped sprinkles, they’re not only visually appealing but also perfect for holiday gatherings, gifting, or seasonal baking projects. These cookies are a whimsical way to bring a little joy into your kitchen during the festive season.
How do I store Grinch Cookies?
To keep your Grinch Cookies fresh, store them in an airtight container at room temperature for up to a week. If you want to make them ahead of time, freezing is a great option. Simply place the cookies in a freezer-safe bag, and they can last for up to three months. When you’re ready to enjoy them, reheat them briefly in the microwave to give them that fresh-baked taste that everyone loves.
Can I customize the flavor of Grinch Cookies?
Absolutely! While the traditional Grinch Cookies have a delightful peppermint flavor, the recipe is quite versatile. You can replace the peppermint extract with almond or vanilla for a different taste. Additionally, feel free to mix in chocolate chips, crushed candy canes, or even nuts to add extra texture and flavor. Tailoring these cookies allows you to create a personal twist for your holiday celebrations.
What occasions are ideal for making Grinch Cookies?
Grinch Cookies are perfect for a variety of occasions. Their festive color makes them an excellent choice for Christmas parties, holiday cookie exchanges, and family gatherings. You could also bake them as a fun activity with kids, bringing joy and creativity into your kitchen. Their vibrant appearance and delicious taste make them crowd-pleasers at any festive event, ensuring everyone leaves with a smile.
Conclusion for Grinch Cookies
In summary, Grinch Cookies are a delightful addition to your holiday baking lineup. With their cheerful green color and festive flavors, they bring joy and whimsy to any occasion. Easy to make and customizable, these cookies can be enjoyed fresh or stored for later. Make sure to whip up a batch this holiday season to spread some cheer and create cherished memories with family and friends. Don’t miss out on the chance to impress everyone with these charming Grinch Cookies.
Delicious Grinch Cookies Recipe for a Festive Holiday Treat
Enjoy these vibrant Grinch Cookies infused with peppermint, perfect for holiday cheer.
red heart-shaped sprinkles or cinnamonfor decoration
Equipment
Oven
Baking sheet
parchment paper
mixing bowl
hand-held mixer
cookie scoop
Method
Preheat the oven to 375°F. Line a large baking sheet with parchment paper and set aside.
Use a hand-held mixer or stand mixer to mix together the cake mix, butter, and eggs until well combined.
Add in the peppermint extract, vanilla extract, and enough green food coloring to achieve your desired color. Mix on low speed just until combined; the batter will be thick and sticky.
In a small bowl, whisk together the powdered sugar and cornstarch.
Scoop the dough with a 1 ½ tablespoon cookie scoop and roll the cookie dough balls in the powdered sugar mixture to coat. Place about 1 inch apart on the prepared baking sheet.
Bake for 10 to 12 minutes, or until the edges are set and the top of the cookies appear dry.
Remove the cookies from the oven and immediately place a heart-shaped sprinkle on each cookie, gently pressing it down so it sticks to the cookie.
Cool the cookies on the baking sheet for 5 minutes before removing to a wire rack to cool completely.
At Recipe Blog Tips, we believe that cooking should be fun, simple, and full of flavor. Our recipes are made for everyone, from beginners to seasoned cooks using ingredients you can easily find at home.