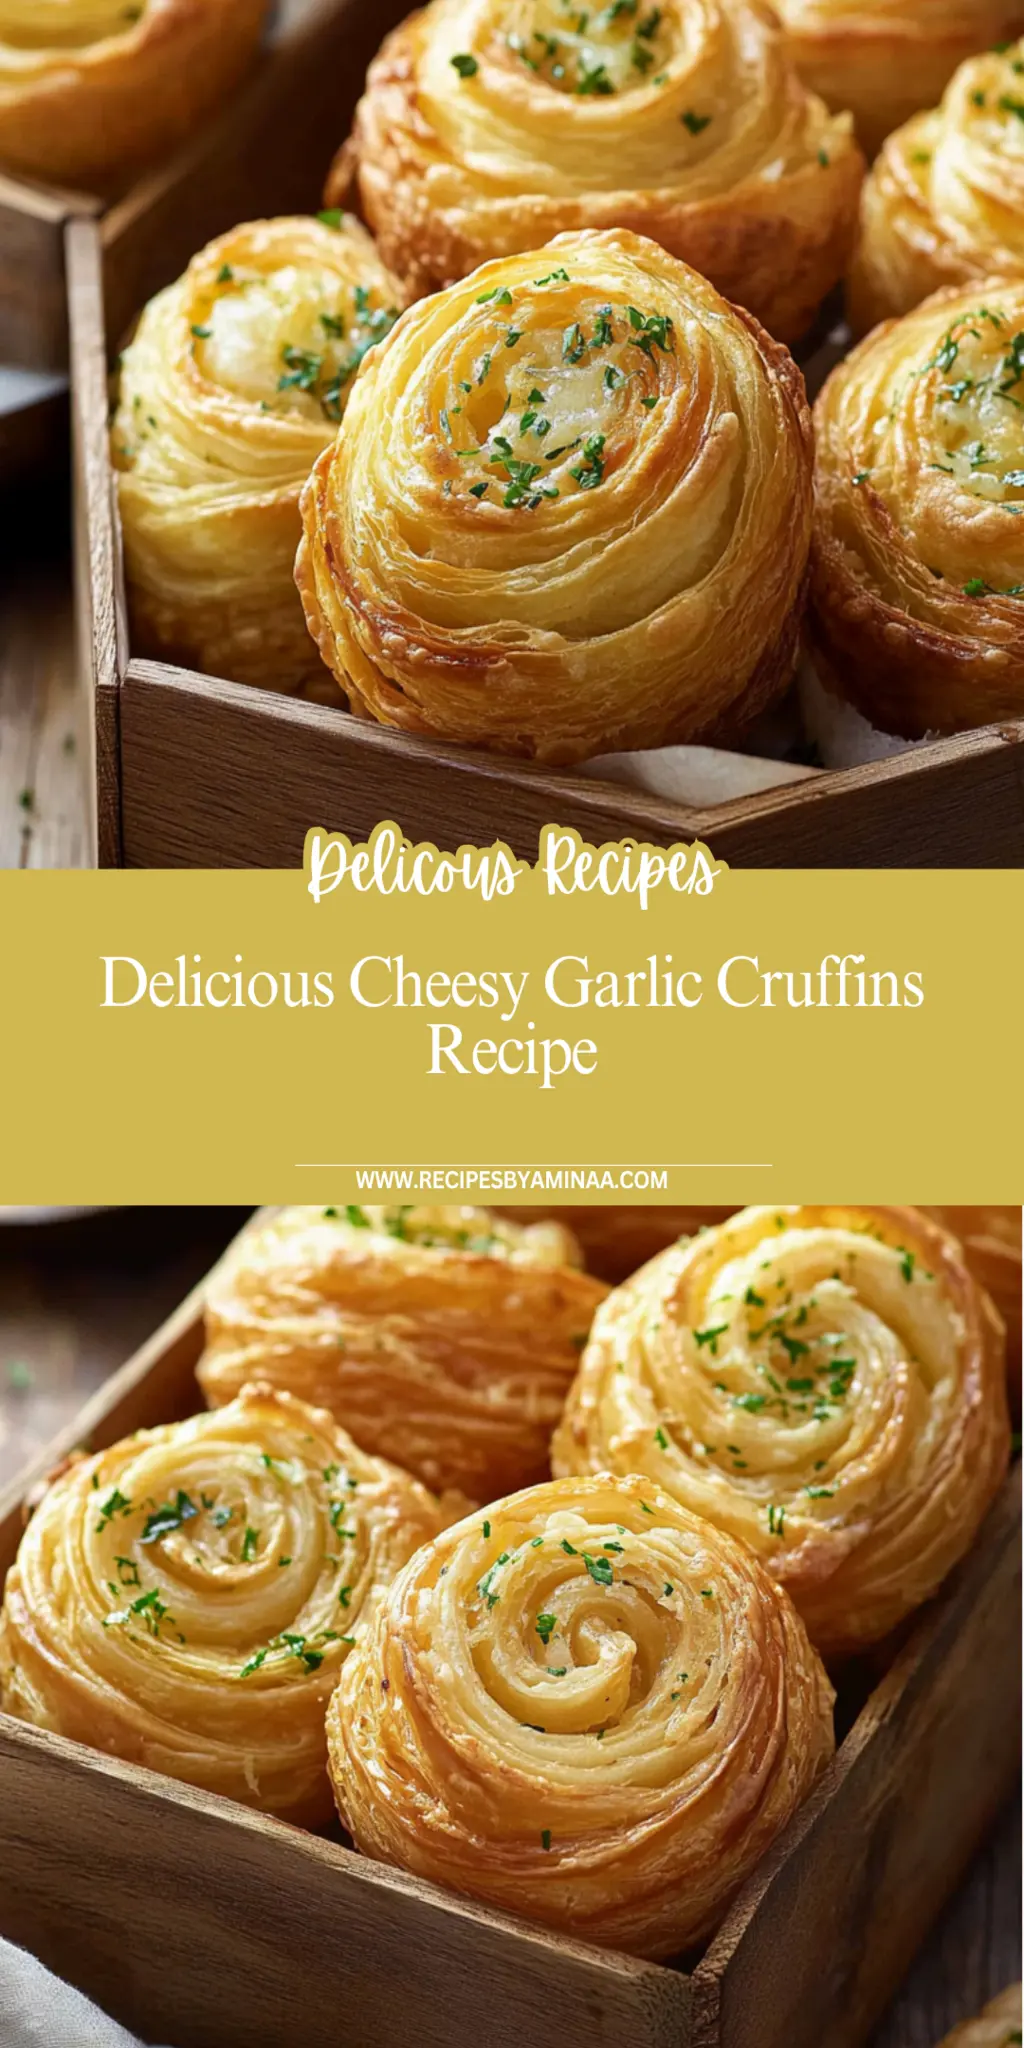
Cheesy Garlic Cruffins Recipe: Easy, Delicious, and Irresistible
Imagine biting into a warm, flaky Cheesy Garlic Cruffin, where the buttery layers enclose a gooey blend of rich cheddar and a punch of garlic. This delightful treat is what dreams— and stomachs—are made of, making it the perfect addition to your brunch table or that late-night snack craving you just can’t shake.
Now close your eyes and envision yourself in the kitchen, apron on, as the enticing aroma of garlic wafts through the air, mingling beautifully with melted cheese. You’ll feel like a culinary superstar, and the best part? You didn’t need a fancy chef’s hat or years of cooking experience to pull this fantastic creation off. Get ready for a flavor journey that will leave you wanting more!
Why You'll Love This Cheesy Garlic Cruffins
This incredible Cheesy Garlic Cruffins transforms simple everyday ingredients into restaurant-quality flavors that will blow your mind completely.
Foolproof recipe techniques guarantee perfect results every single time, making even novice cooks feel like professional chefs instantly.
Stunning visual appeal with gorgeous colors and mouthwatering aromas creates the ultimate Instagram-worthy dish for any special occasion.
Endlessly adaptable for different dietary needs while working beautifully for meal prep, date nights, or entertaining large groups effortlessly.
Ingredients for Cheesy Garlic Cruffins
Here’s what you’ll need to make this delicious Cheesy Garlic Cruffins:
3 tubes (8 ounces each) refrigerated crescent roll sheets – These are the base of your cruffins; they add the light and flaky texture that makes every bite a joy.
½ cup (1 stick / 113 g) unsalted butter, softened – This will give your cruffins a rich flavor and help the layers stay deliciously moist.
1 tablespoon chives, finely chopped – Chives bring a mild onion flavor that beautifully complements the garlic and cheese.
1 tablespoon garlic, minced – Fresh garlic is a must for that quintessential savory kick; it’s what makes the aroma truly intoxicating.
3 cups (339 g) mild cheddar cheese, shredded, divided – Cheddar’s creamy, tangy profile is the star of the show, giving a delightful cheesiness in every bite.
3 tablespoons unsalted butter, melted – A buttery topping adds a rich finish to your warm cruffins, taking them to the next level.
1 teaspoon garlic, minced – Because one tablespoon was not enough! A little more garlic keeps things bold.
1 teaspoon chives, finely chopped – A second sprinkle for garnishing uplifts both flavor and presentation.
1 teaspoon kosher salt – Enhances all the flavors and brings everything together beautifully.
How to Make Cheesy Garlic Cruffins
Follow these simple steps to prepare this delicious Cheesy Garlic Cruffins:
Step 1: Preheat the Oven
Preheat your oven to 350°F (175°C). Don’t forget to lightly spray a standard 12-cup muffin tin with nonstick cooking spray to ensure each cruffin pops out easily!
Step 2: Roll Out the Dough
On a lightly floured work surface, roll each tube of dough into a 12×16-inch rectangle. The goal is to make those flaky layers proud!
Step 3: Prepare the Garlic Butter Mixture
In a medium bowl, combine the softened butter, chopped chives, and minced garlic. Spread about a third of this aromatic butter mixture over one sheet of dough, and don’t be shy—go generous!
Step 4: Add the Cheese
Sprinkle 1 cup of shredded cheddar cheese evenly over the buttered dough. Remember, it’s all about cheese, cheese, and more cheese.
Step 5: Roll and Cut the Dough
Starting from the long end of the dough, tightly roll it up into a log. Cut the log in half, creating two shorter logs. Then, slice each short log in half lengthwise for a total of four sections of dough. Repeat this process with the remaining sheets.
Step 6: Shape and Bake
Now, each section of dough is going to transform! With the layered side facing out, roll each piece tightly into a cinnamon roll shape. Tuck in the end piece and place it into the prepared muffin tin. Repeat until you have filled the tin with all 12 sections. Bake for 20-25 minutes or until your cruffins are golden brown and irresistible.
For the grand finale:
Once your cruffins are baking, whisk together the melted butter, extra minced garlic, chives, and kosher salt in a small bowl. When those delectable treats emerge from the oven, brush this garlic butter topping over the warm rolls to create a final touch of flavor that your taste buds will thank you for.
Transfer to a plate for serving and get ready to witness your guests marvel at your culinary prowess!
If you’re looking for a comforting snack, a hearty breakfast, or an impressive treat to share, these Cheesy Garlic Cruffins deliver on all fronts. Perfectly crisp on the outside and decadently cheesy on the inside, they truly are the delightful surprise you never knew your kitchen needed!
Each bite is a celebration of flavors—perfectly cheesy, warmly fragrant, and simply unforgettable! So grab your ingredients and get rolling; your couch will thank you for the delicious, cheesy reward afterward!
You Must Know About Cheesy Garlic Cruffins
This showstopping Cheesy Garlic Cruffins delivers restaurant-quality results using simple ingredients you probably already have at home.
The perfect balance of textures and flavors creates an unforgettable dining experience that will have everyone asking for seconds.
Picture-perfect presentation with vibrant colors makes this dish absolutely Instagram-worthy and guaranteed to impress any dinner guest.
Incredibly versatile recipe that works beautifully for weeknight dinners, meal prep, special occasions, or even outdoor entertaining sessions.
Perfecting Cheesy Garlic Cruffins Cooking Process
To create the ultimate Cheesy Garlic Cruffins, start by prepping your dough and garlic butter first. This way, once your crescent rolls are rolled and placed in the muffin tin, you’re ready to slide them into the oven for a quick bake.
Add Your Touch to Cheesy Garlic Cruffins
Feel free to customize your Cheesy Garlic Cruffins by swapping out the cheddar cheese for your favorite variety, such as pepper jack for a spicy kick, or adding crispy bacon bits for an indulgent twist.
Storing & Reheating Cheesy Garlic Cruffins
Store any leftovers in an airtight container for up to two days. To reheat, pop them in a preheated oven for 5-10 minutes, ensuring they regain their crispy texture while heating through.
Chef's Helpful Tips for Cheesy Garlic Cruffins
This professional-quality Cheesy Garlic Cruffins relies on precise timing and temperature control to achieve restaurant-standard results consistently.
Master the art of mise en place by prepping all ingredients beforehand, ensuring smooth execution and preventing any last-minute cooking disasters.
The secret lies in layering flavors throughout the cooking process rather than seasoning only at the end for maximum depth.
Pro tip: let the finished dish rest for optimal texture and flavor development before serving to hungry guests waiting eagerly.
Sharing this delightful dish with friends, I’ll never forget the laughter and compliments that filled the kitchen as we devoured these gooey Cheesy Garlic Cruffins together, with everyone fighting for the last one!
FAQs About Cheesy Garlic Cruffins
What are Cheesy Garlic Cruffins?
Cheesy Garlic Cruffins are the delightful marriage of croissants and muffins, yielding flaky, buttery rolls stuffed with creamy cheese and aromatic garlic. Using refrigerated crescent roll sheets makes this recipe approachable and fun for home bakers. The rolls boast a crispy exterior and a gooey cheese center that brings joy with every bite. Paired with a luscious garlic butter topping, these cruffins are not just a treat; they’re a celebration of flavor that’s perfect for any gathering or as a cozy snack at home.
How do I make Cheesy Garlic Cruffins?
Making Cheesy Garlic Cruffins is simpler than you might think! Start by rolling out crescent rolls and spreading a blend of softened butter, minced garlic, and chives. Layer it with shredded cheddar cheese, then roll and slice the dough into sections. Place the rolls in a muffin tin and bake until golden brown. Finish them off with a brush of garlic butter while they’re warm. The whole process takes about 45 minutes, making it a quick and delicious project.
Can I customize my Cheesy Garlic Cruffins?
Absolutely! The beauty of Cheesy Garlic Cruffins lies in their versatility. Feel free to experiment with different types of cheese, such as mozzarella or pepper jack for a spicy twist. You can also add ingredients like cooked bacon or sautéed spinach for extra flavor and nutrition. Play around with herbs too—rosemary or thyme can introduce delightful new tastes. The possibilities are endless, allowing you to create something truly unique every time.
How should I store and reheat my Cheesy Garlic Cruffins?
To preserve their glorious texture, store any leftover Cheesy Garlic Cruffins in an airtight container at room temperature for up to two days. If you want to enjoy them later, pop them into a preheated oven for 5-10 minutes to help them regain their crispy exterior. Avoid microwaving, as that can make them soggy. With these simple storage and reheating tips, you can savor that first-day flavor even after a couple of days!
Conclusion for Cheesy Garlic Cruffins
Cheesy Garlic Cruffins offer a quick and delicious way to impress family and friends with minimal effort. With their flaky texture and rich cheesy filling, they are perfect as an appetizer or a delightful snack. Remember to experiment with different ingredients to make each batch uniquely yours. Whether you’re serving them at a party or enjoying them on a cozy night in, these Cheesy Garlic Cruffins are sure to become a favorite in your recipe collection.
Cheesy Garlic Cruffins
Cheesy Garlic Cruffins are delightful flaky rolls packed with creamy cheese and aromatic garlic.
Preheat oven to 350°F. Lightly spray a standard 12-cup muffin tin with nonstick cooking spray. Set aside.
Working on a lightly floured work surface, roll out each tube of dough to a 12×16-inch rectangle.
In a medium bowl, combine butter, chives, and garlic. Spread about ⅓ of the butter mixture over the top of one sheet of dough. Sprinkle 1 cup of the cheddar cheese evenly over the butter mixture.
Starting on the long end of the dough sheet, tightly roll it up into a log. Cut the log in half, creating two shorter logs. Cut each of those shorter logs in half lengthwise, giving you four sections of dough. Repeat with the remaining two sheets of dough. You will have 12 sections of dough.
Working one section of dough at a time with the layered side facing out, roll it tightly into a cinnamon roll shape, tucking in the end piece of dough. Place into the prepared muffin tin. Repeat with the remaining 11 sections.
Bake for 20-25 minutes, or until golden brown.
While the cruffins are baking, prepare the garlic butter. In a small bowl, whisk together the butter, garlic, chives, and salt. Brush the butter topping over the warm rolls.
Nutrition
Serving: 1cruffinCalories: 403kcal
Notes
Feel free to customize with different cheeses or additional ingredients like bacon for extra flavor.
Aminaa Turner is a passionate home cook and recipe developer who loves creating simple, delicious dishes that bring people together. Through RecipesByAminaa, she shares easy everyday meals, comforting dinners, and indulgent desserts made with fresh, wholesome ingredients to inspire you in the kitchen.
Get Top 5 Lunch Recipes
Our Top 5 Dinner Recipes feature the most delicious and satisfying meals that are simple to make and impossible to forget.
At Recipe Blog Tips, we believe that cooking should be fun, simple, and full of flavor. Our recipes are made for everyone, from beginners to seasoned cooks using ingredients you can easily find at home.